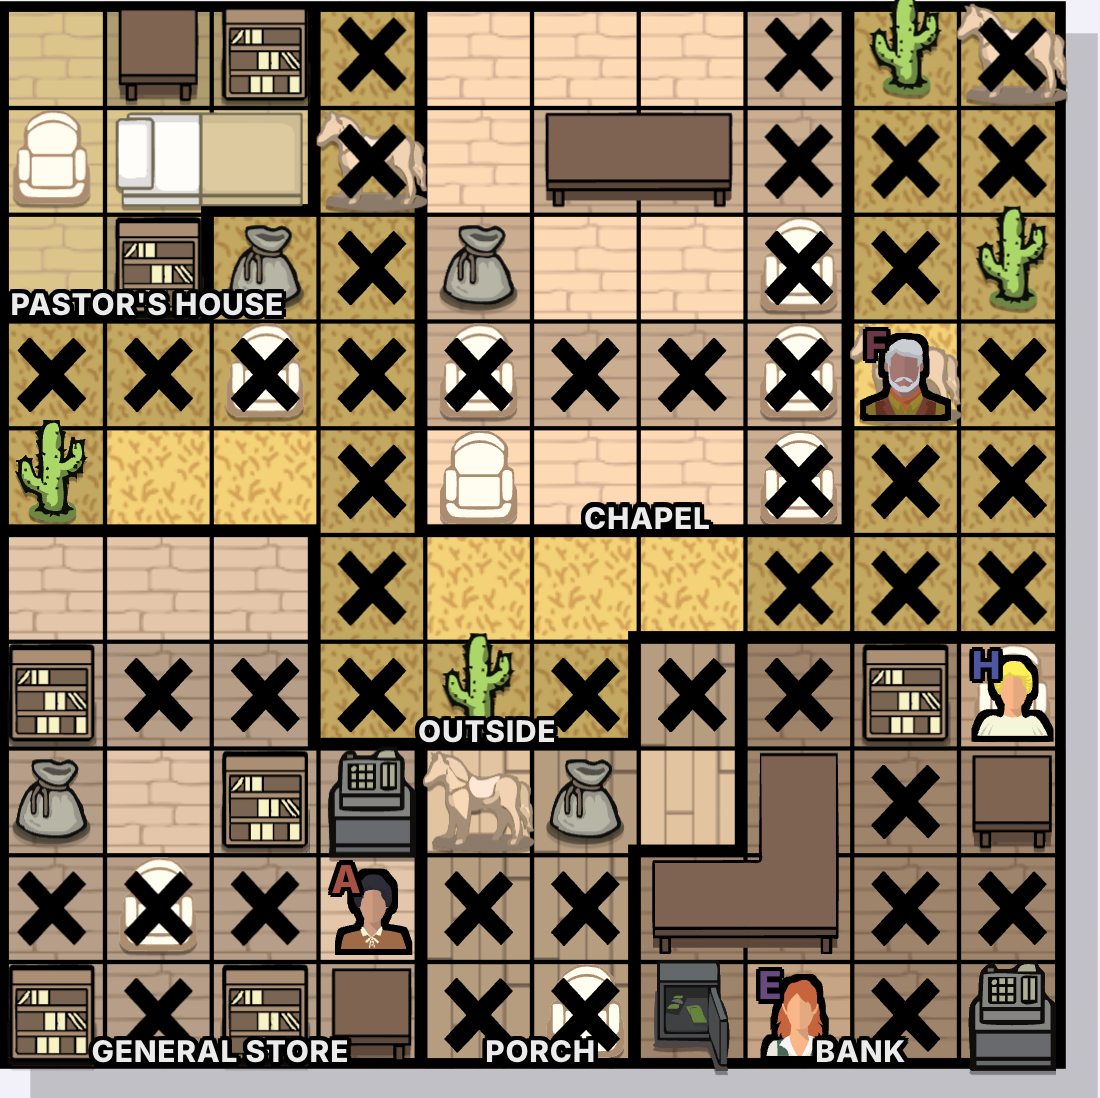
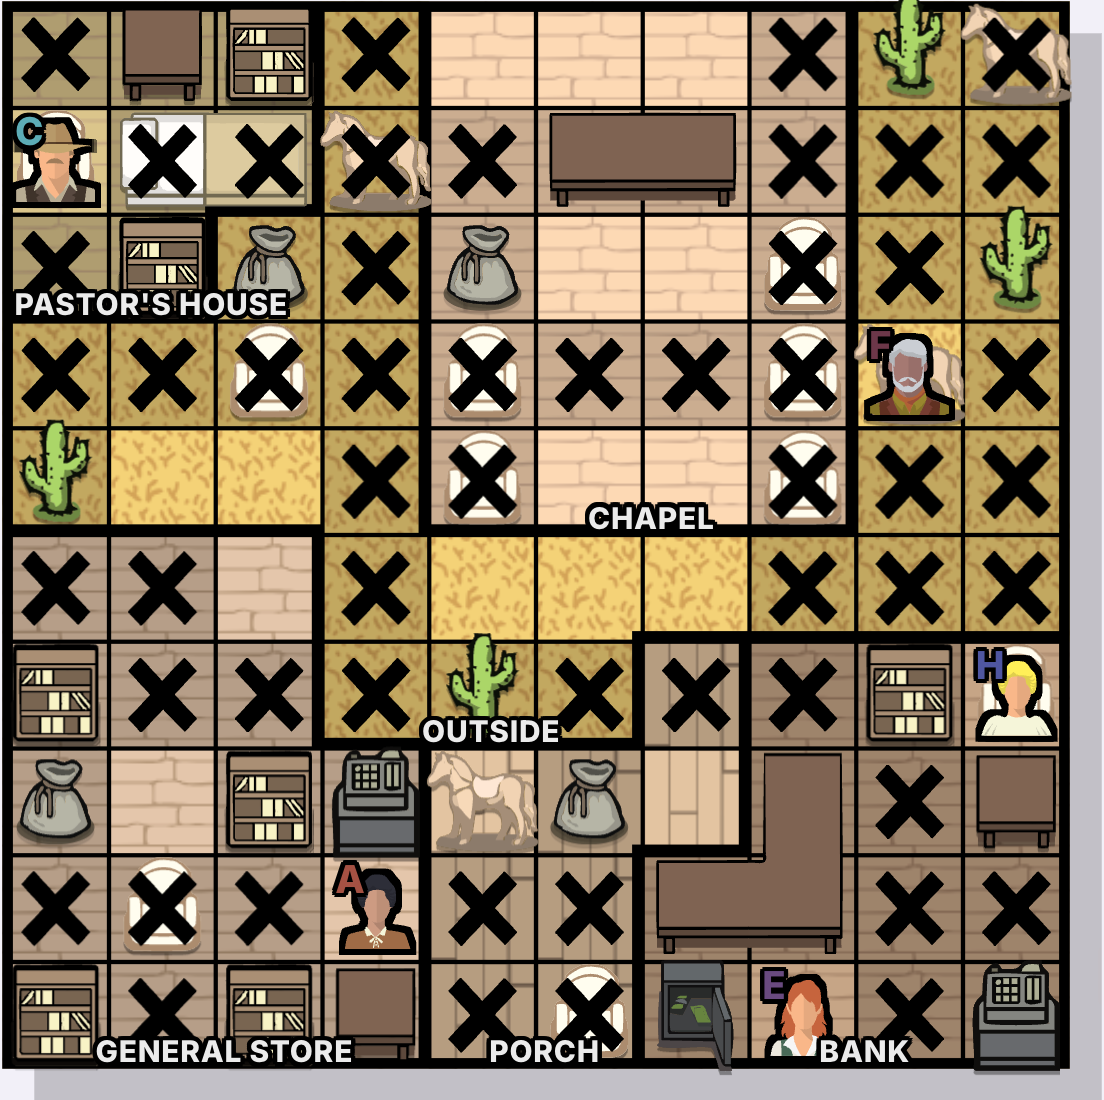
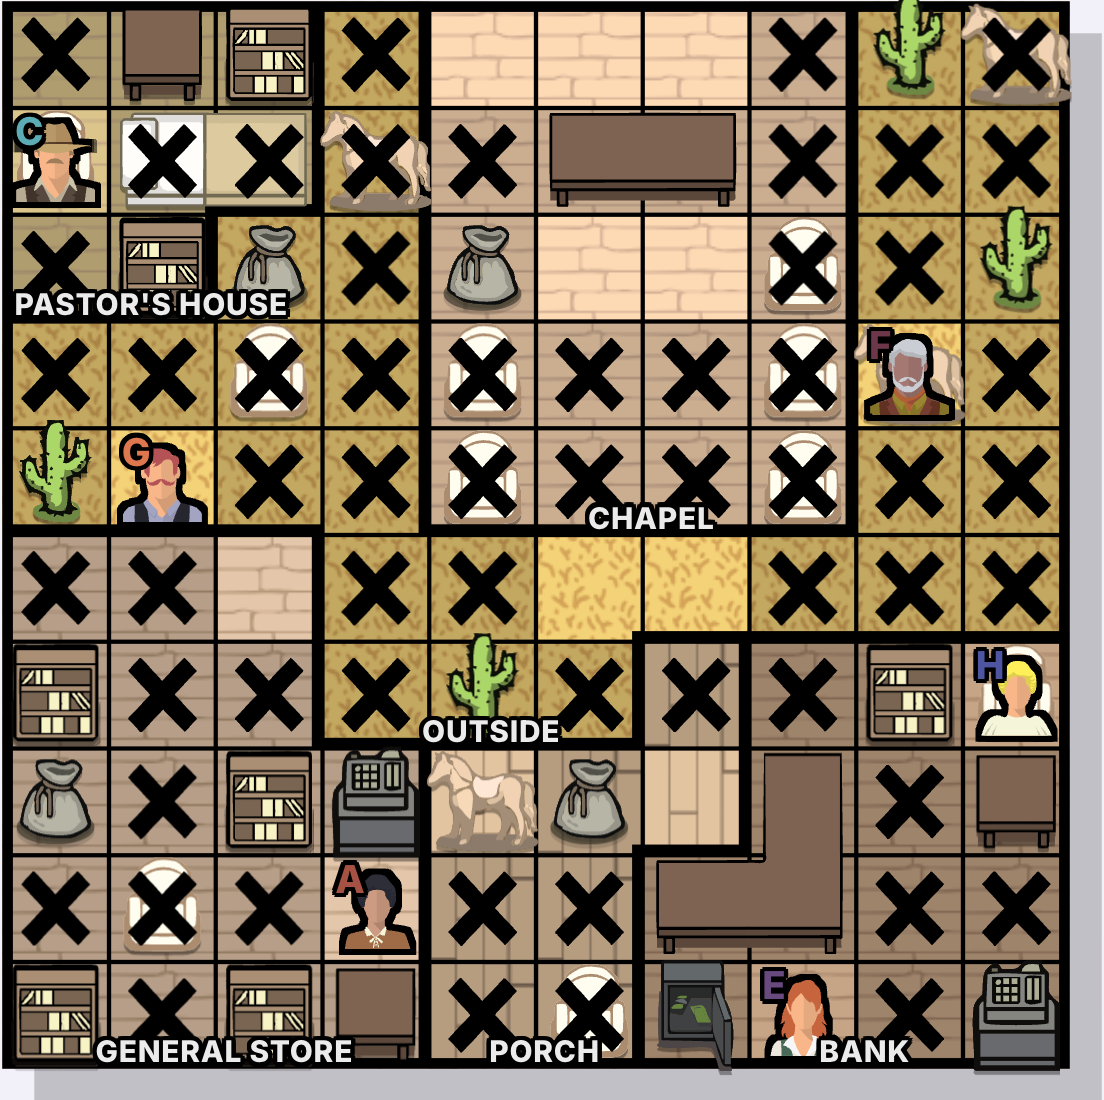
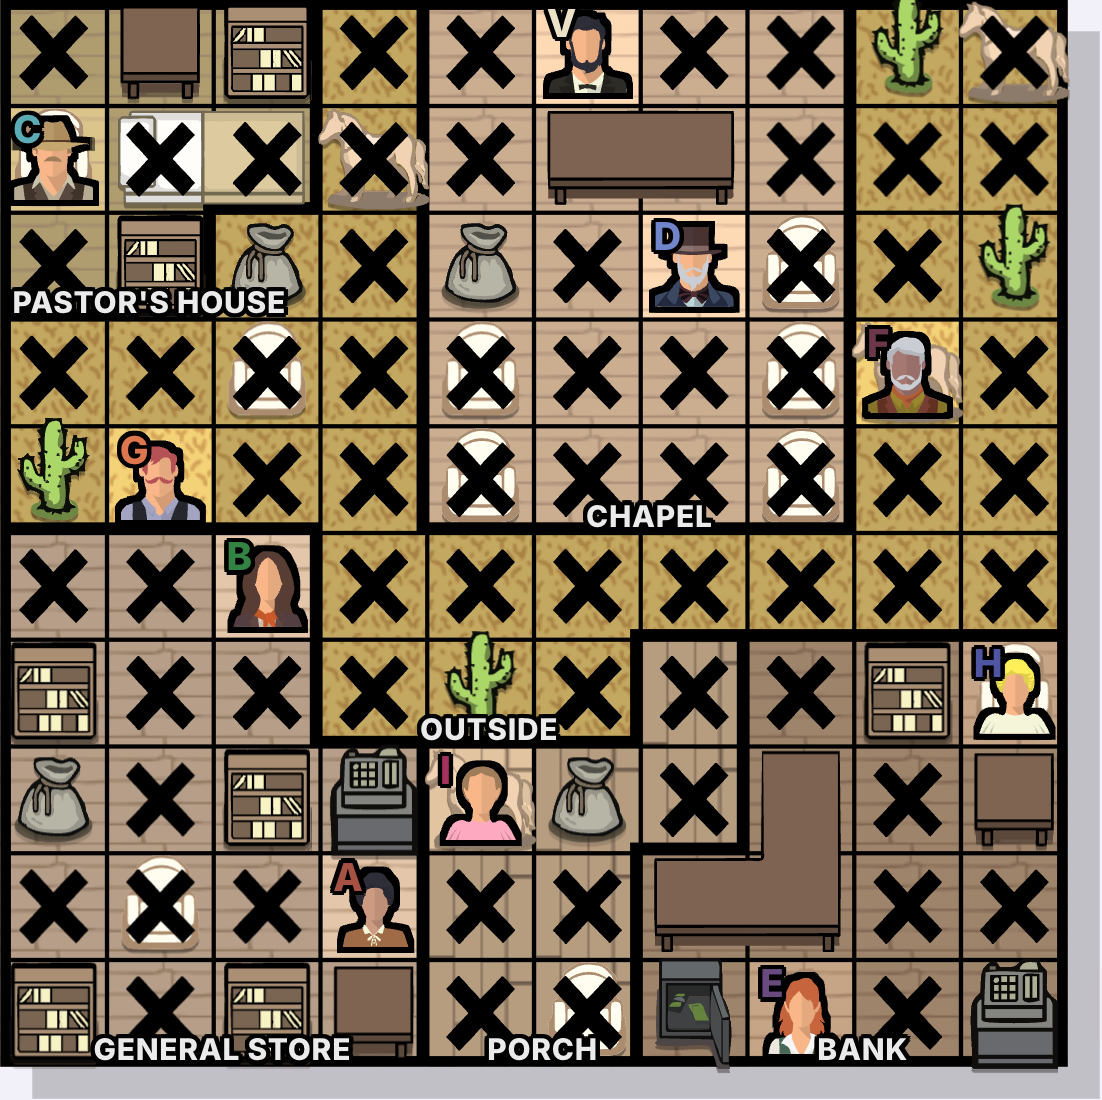
Do not jump to the solved board yet. Try a few more deductions first; if you are stuck, click View hint.
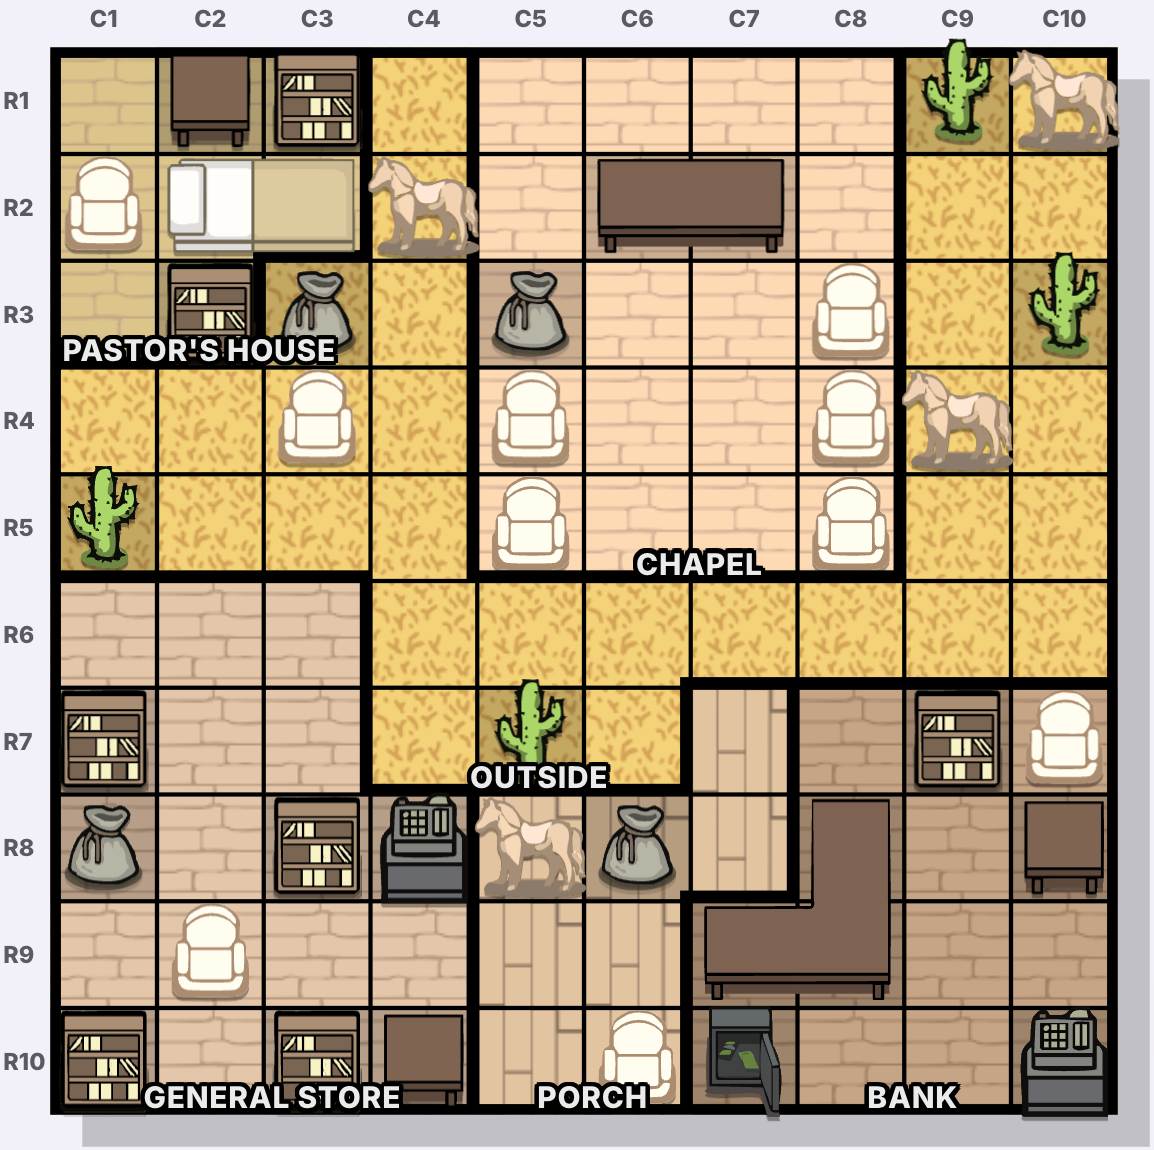
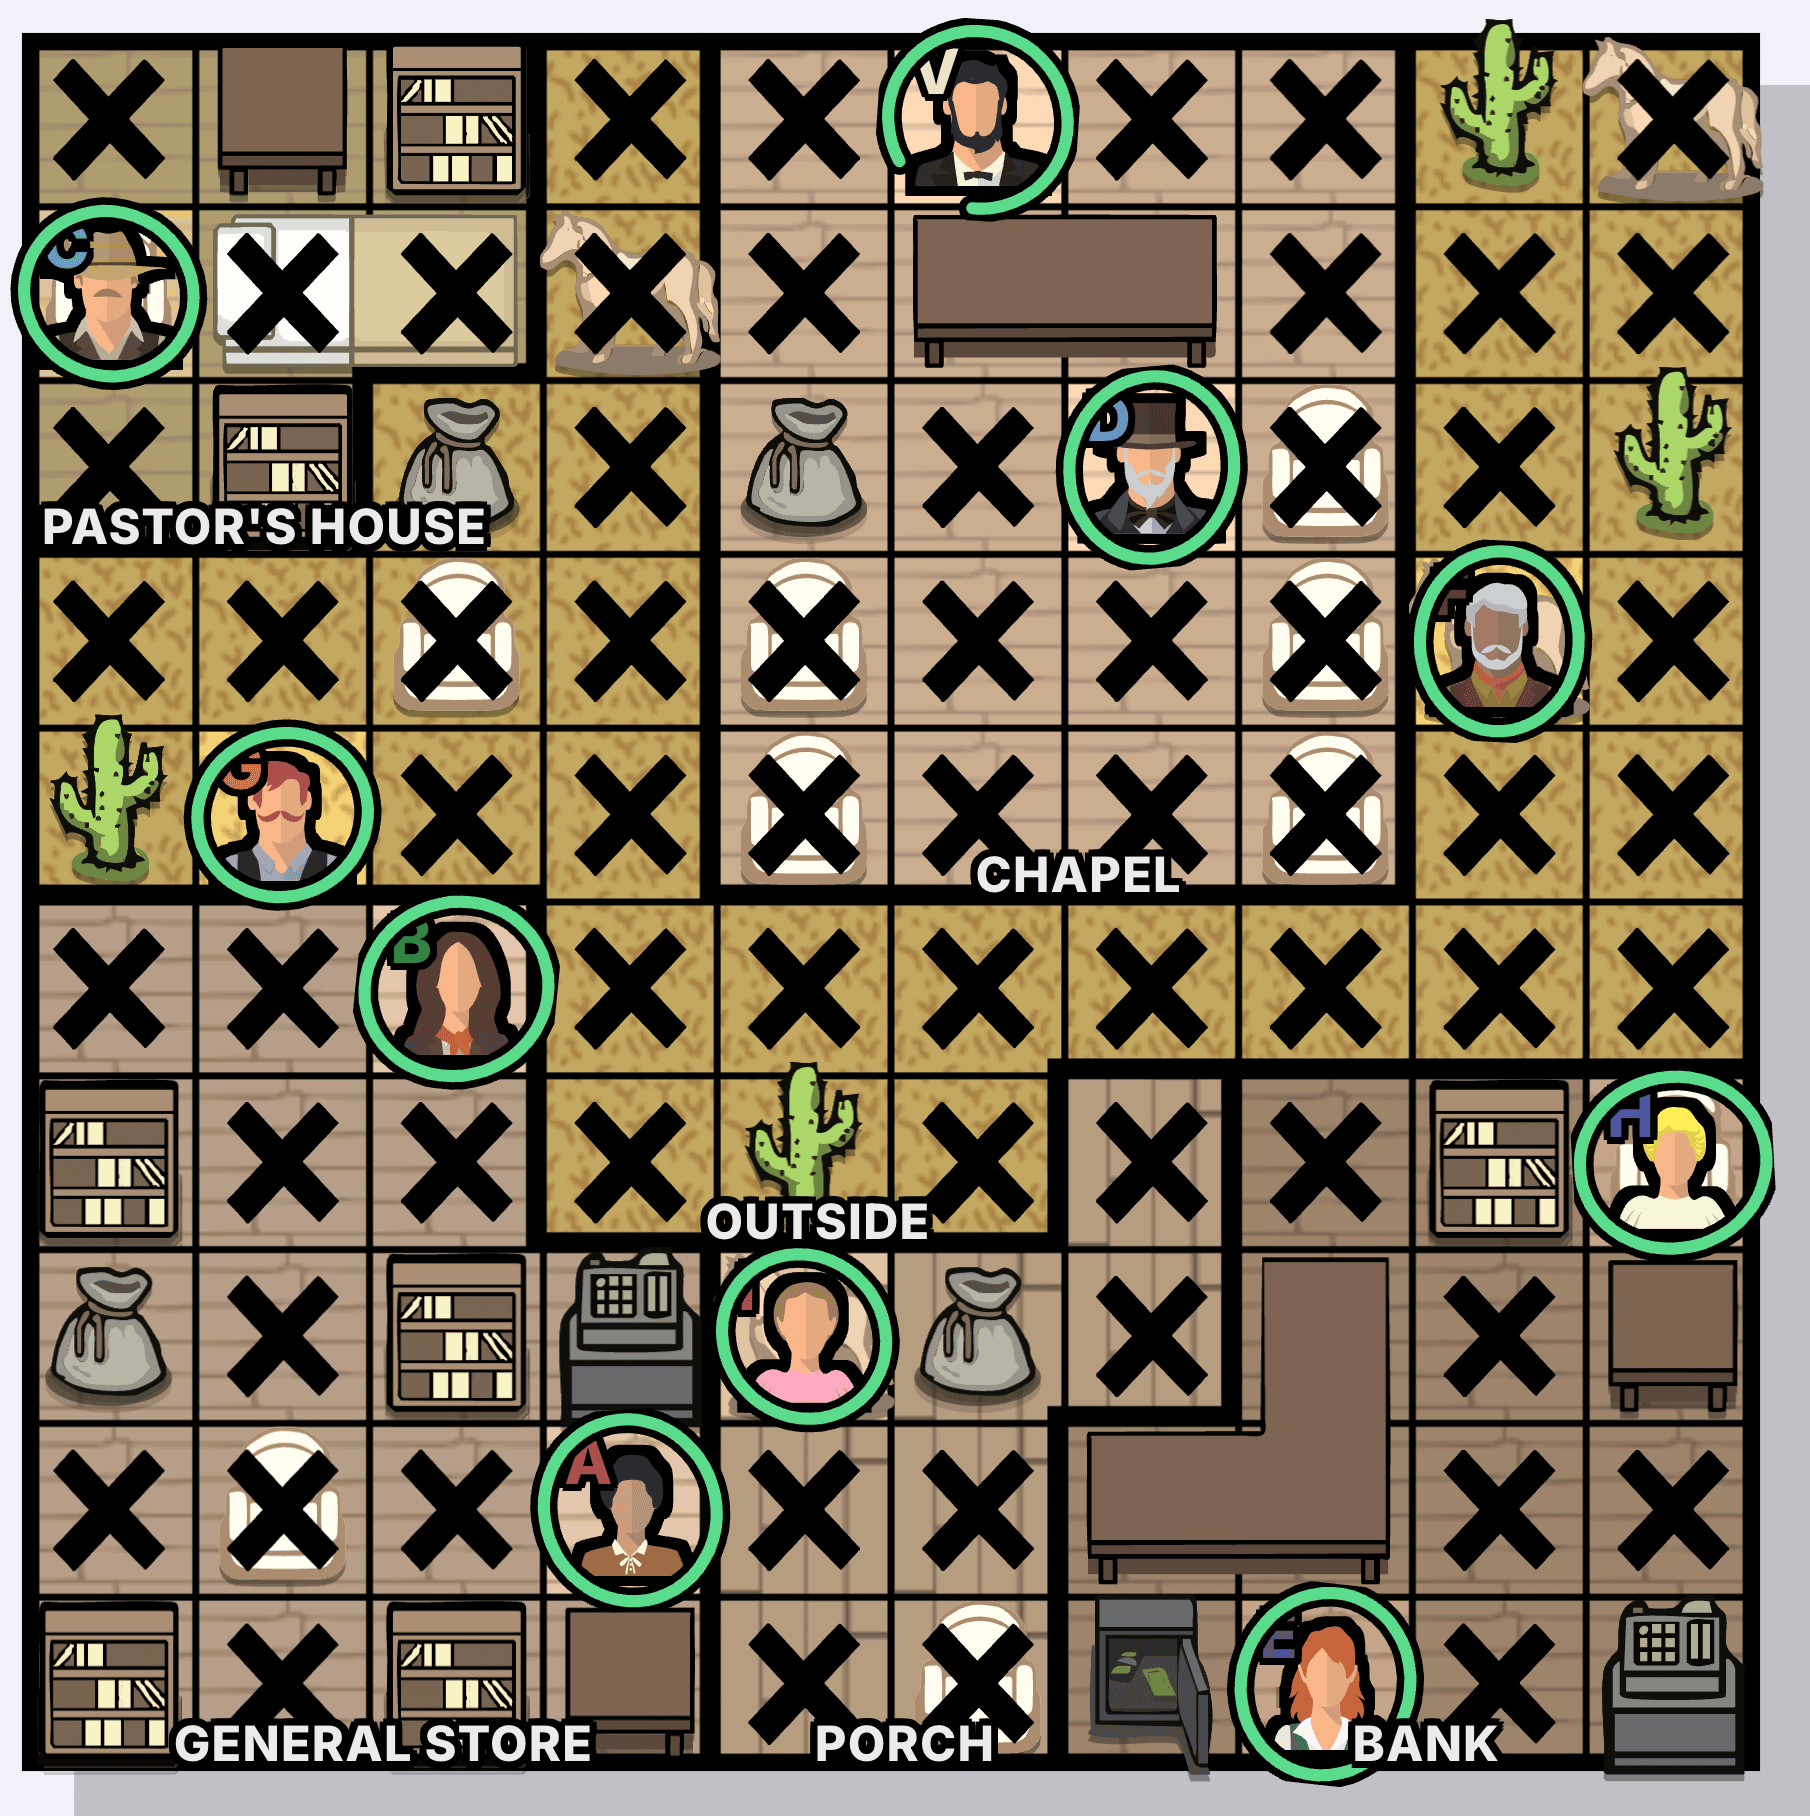
Frontier Town Murdoku coordinate map - columns C1-C10 and rows R1-R10
Coordinate note: R1 means row 1, C1 means column 1, and C1R1 is the upper-left cell. The grid is 10×10.
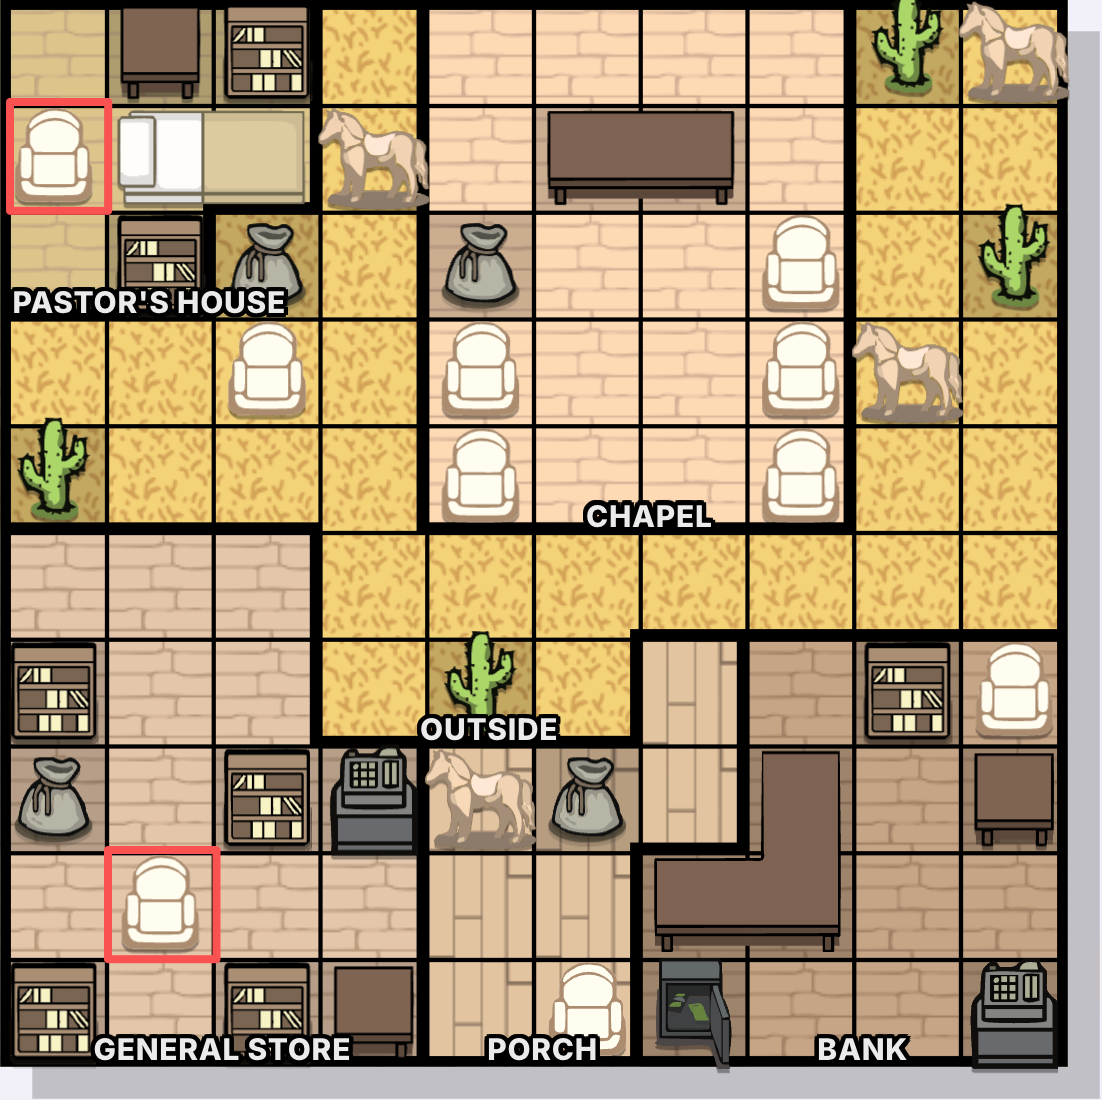
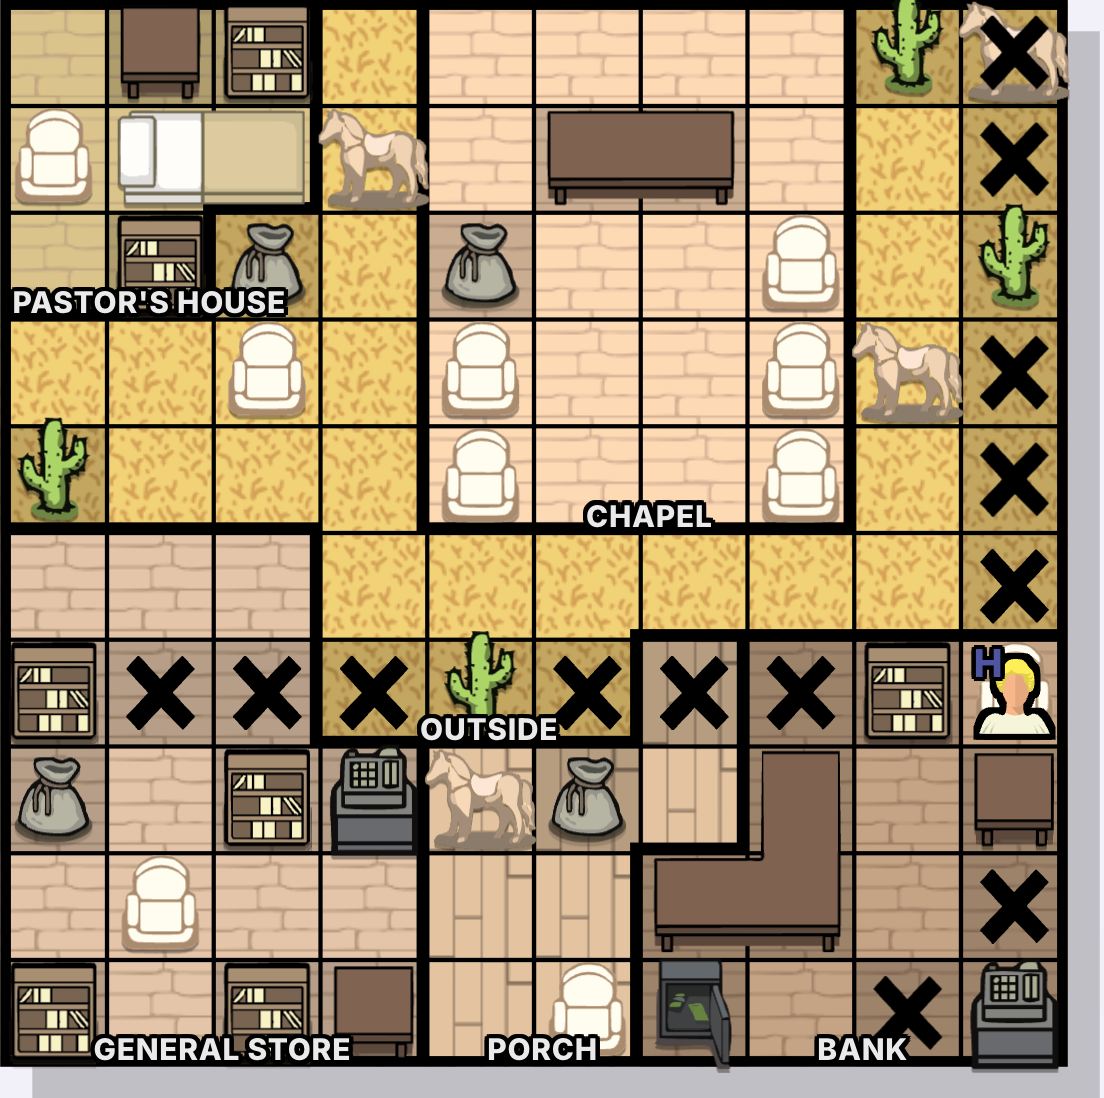
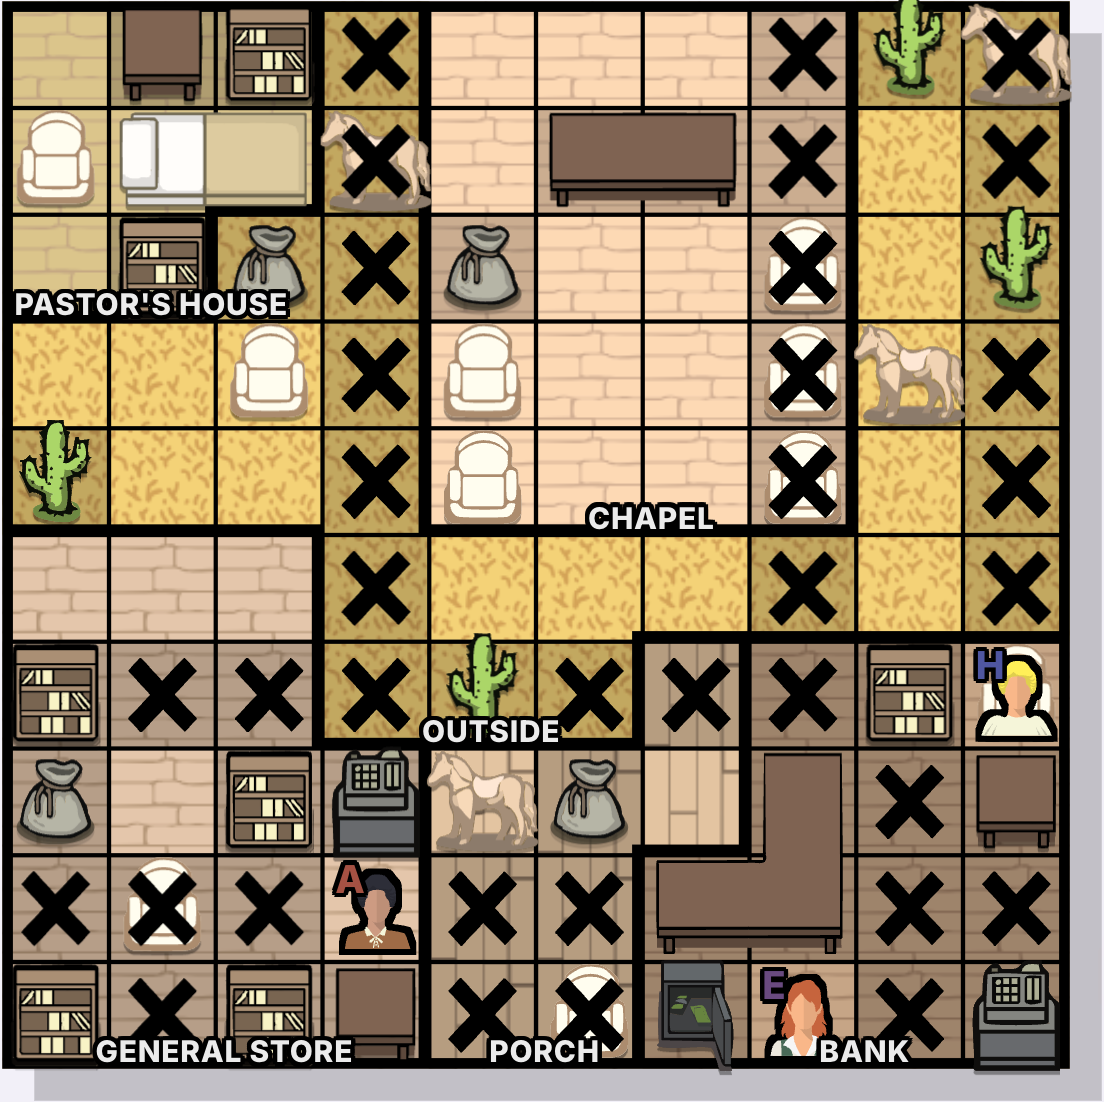
The clues imply the outlaw must be a suspect beside a table and sharing an area with H, who is sitting in a chair. If H sat at R2C1 or R9C2, every table-adjacent cell would be blocked. The Chapel also cannot hold a suspect who is both outlaw and beside its table. If H were in the Chapel, check every suspect one by one: A cannot be in the Chapel, B is in a corner and cannot be beside the table, C is on a chair but not beside the table, D and V are ruled out directly by their clues, E is in the Bank, F is on a horse, G is beside a cactus, and I is south of H. Therefore H cannot be in the Chapel and must be in the Bank.Therefore H can only sit with a table-adjacent suspect in the Bank. Put H on the chair at R7C10; then E is the only suspect who can fit beside a Bank table. Block E's intersecting cell, R10C9.This fixes A in the last cell beside a Register. Since I is south of H, I and E must occupy R8 and R10 in some order, and nobody else can use those two rows.F is forced onto the last horse, and then E is fixed. That sets I in R8.G can only be R5C2 or R6C5. Block the intersections R6C2 and R5C5; this leaves C forced onto the last chair.B can only be R6C3 or R1C5. Block the intersections R6C5 and R1C3; that fixes G in the last cell beside a cactus.D is forced into the last cell beside a chair, then I into the final R8 cell, B into the last corner, and V into the final remaining cell.
All hint layers are open. Use the solved board only to check your final placement.
With your permission, Google Analytics, Mediavine Grow, Microsoft Clarity, Ahrefs and our site analytics may use cookies or similar technologies to measure visits and improve this guide. This choice controls optional analytics only. Google manages advertising privacy choices separately where required.